Is your room feeling more cluttered catch-all than cozy sanctuary? Don’t let a lack of storage crush your home goals! At HUBGH, we know that true style comes from intentional organization, especially when it’s achieved smartly and sustainably. You don’t need expensive, matching bins to conquer the clutter; you need a little creative repurposing. We’re here to show you how to look at the items destined for the recycling bin and see them as stylish, custom-made organizational heroes. Get ready to inject harmony into your drawers, utilize every inch of wall space, and transform your everyday mess into a beautifully ordered, functional haven. Let’s make your small space feel magically bigger with these three beginner-friendly, zero-cost room organization hacks!
Hack 1: The Upcycled Cardboard Drawer Dividers
Drawers are notorious for devolving into a jumbled mess of socks, stationery, or supplies. Custom dividers are the secret to drawer sanity, and you can make them perfectly sized for your needs using materials you already have!
Budget-Friendly Materials: Old cereal boxes, shoe boxes, or any thin, sturdy cardboard you have saved from recent deliveries. A roll of attractive wrapping paper, wallpaper scraps, or fabric remnants to cover them.
Simple Steps: Empty your drawer and measure the interior length, width, and depth. Cut the cardboard into strips that match the depth of your drawer. You’ll need several strips for the length and width of your desired grid. Carefully cut slots (half the depth of the strip) into the cardboard where the pieces will intersect, allowing them to slide and lock together like puzzle pieces to form your grid. Before assembling, wrap each cardboard strip smoothly with your chosen paper or fabric remnant—this step instantly elevates them from trash to treasure! Place the assembled grid directly into the drawer.
Creative Styling: Choose a cohesive color palette for your wrapping material. Use a vibrant, unexpected print for a fun pop inside a dull dresser, or go with a simple, chic linen look using burlap or canvas fabric remnants for a minimalist aesthetic.
Hack 2: Vertical Wall-Mounted Jars for Tiny Items
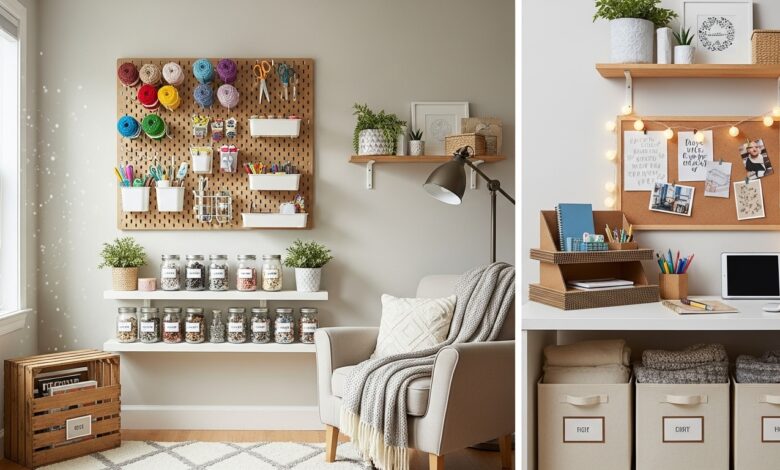
When floor and counter space are limited, the only way to go is up! This is a fantastic hack for craft rooms, bathrooms, or small home offices where tiny items constantly get lost.
Budget-Friendly Materials: Repurposed glass jars (think empty pasta sauce jars, pickle jars, or mason jars). Scrap wood (a thin plank from a pallet or a piece of trim). Screws and an affordable spray paint color.
Simple Steps: Remove all labels from the glass jars. Lightly sand your scrap wood piece. Measure the jars and mark their positions on the wood plank. Secure the jar lids to the wood plank using screws—make sure the screws go through the center of the lid. Paint the wood plank a beautiful, dark color (like matte black or deep teal) for a modern, high-contrast look. Once dry, mount the wood plank securely to your wall. Fill the jars with your bits and bobs (like cotton swabs, paper clips, beads, or hardware) and simply screw the filled jars onto the mounted lids!
Creative Styling: Mix and match jar sizes for visual interest. Spray paint the lids only in a metallic gold or copper before mounting for an elegant touch. Place the plank near a desk or mirror, and use the top edge of the plank as a mini-shelf for a small succulent or a tiny framed photo.
Hack 3: The Magazine File Magic
Magazine holders are a DIY organizer’s secret weapon, especially for vertical storage of flat, bulky, or awkward items that tumble over easily.
Budget-Friendly Materials: Old magazine file boxes (you can find affordable, plain cardboard ones at dollar stores or use old ones you already own). Paint or contact paper for personalization.
Simple Tips: Paint or cover the file boxes to match your room’s décor. For kitchen or pantry organization, use them on their side to vertically store things like cutting boards, baking sheets, or cling wrap boxes—this maximizes cabinet height. In the closet, use them upright on a shelf to store clutches, small handbags, or folded t-shirts. On a desk, they corral laptops, notebooks, and binders perfectly.
Creative Styling: For a chic, library look, choose a deep jewel tone paint and add a small, handwritten or printed label to the front of each file (e.g., “Clutches,” “Office Files,” “Wraps & Foils”). Line three or more up on a shelf for a cohesive, visually appealing display.
Why You’ll Love This Project
Sustainability: By creatively reusing everyday packaging and materials like cardboard and glass jars, you drastically reduce household waste, giving items a beautiful second life and championing the spirit of upcycling.
Affordability: These projects require little to no monetary investment, proving that a well-organized, magazine-worthy home is accessible to everyone, regardless of budget.
Creativity: Each hack is fully customizable, allowing you to choose your own colors, textures, and labels. You get to solve a real-world problem in your home while expressing your unique design aesthetic, making your organizational tools as beautiful as they are functional.
Ditching the clutter doesn’t have to be complicated or expensive—it’s about ingenious, eco-friendly hacks that truly transform your space. Start small, get creative, and enjoy the calm that comes with a perfectly organized room! Try this project and tag HUBGH to share your creation